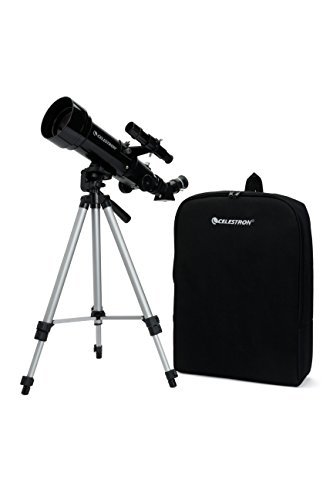

Comes with aluminum tripod and accessory tray.Focal Length of Eyepiece 1 (mm) 20 mm (0.79 in).Focal Length of Eyepiece 2 (mm) 4 mm (0.16 in)
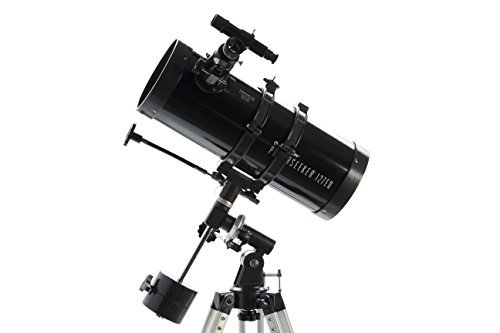
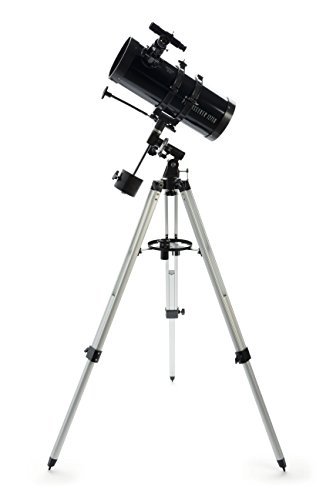
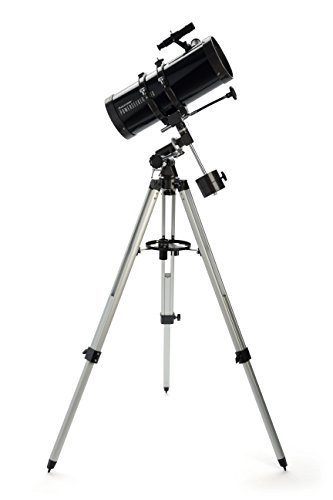
Product Description Celestron 127EQ PowerSeeker Telescope
From the Manufacturer PowerSeeker 127 EQ - General Features
Quick and easy no-tool setup Slow motion controls for smooth tracking Erect image optics - Ideal for terrestrial and astronomical use Fully coated glass optical components with high transmission coatings for enhanced image brightness and clarity 3x Barlow lens triples the magnifying power of each eyepiece Accessory tray for convenient storage of accessories “The Sky” Level 1 planetarium software with 10,000 object database and enhanced images Details Celestron PowerSeeker telescopes are a great way to open up the wonders of the Universe to the aspiring astronomer. The PowerSeeker series is designed to give the first-time telescope user the perfect combination of quality, value, features and power.
Amateur astronomy is a great family hobby that can be enjoyed year round, and Celestron’s PowerSeekers are the ideal choice for families looking for an affordable and high quality telescope that will provide many hours of enjoyment for children and adults alike.
PowerSeekers are quick and easy to set up – even for the novice. No tools are required for assembly!
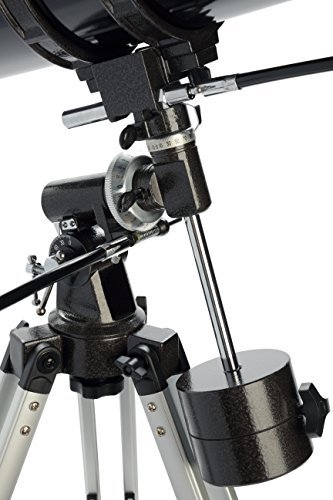
Their sturdy equatorial mounts are perfect for tracking objects in the night sky, and the collapsible alt-azimuth mounts are perfectly suited for terrestrial (land) viewing as well as astronomical use.
All of Celestron’s PowerSeekers include a full range of eyepieces plus a 3x Barlow lens that provides an increase in viewing power hundreds of times greater than that of the unaided eye!
PowerSeekers are designed and manufactured using all fully coated glass optical components with high transmission coatings for enhanced image brightness and clarity.
Erect Image Optics are ideal for terretrial (land) and astronomical (sky) use.
Locate and identify thousands of celestial objects on your laptop or PC with “The Sky” Level 1 software included FREE with every PowerSeeker model.
Specs
Optical Design: Newtonian Reflector Aperture: 127 mm (5 in) Focal Length: 1000 mm (39.37 in) Focal Ratio: 7.87 Eyepiece 1: 20 mm (0.79 in) Magnification 1: 50 x Eyepiece 2: 4 mm (0.16 in) Magnification 2: 250 x Barlow Lens: 3 x Finderscope: 5x24 Mount: German Equatorial Tripod: Aluminum Accessory Tray: No-Tool Tray with Eyepiece holder CD ROM: “The Sky” Level 1 Weight: 17 lb (7.71 kg) Limiting Stellar Magnitude: 13 Resolution (Rayleigh): 1.1 arcsec Resolution (Dawes): 0.91 arcsec Photographic Resolution: 254 line/mm Light Gathering Power: 329 x Angular Field of View: 0.8 ° Linear Field of View (@1000 yds): 43 ft (13.11 m) Optical Coatings: Aluminum Secondary Mirror Obstruction: 1.6 in (40.64 mm) Secondary Mirror Obstruction by Area: 10.2 % Secondary Mirror Obstruction by Diameter: 32 % Optical Tube Length: 20 in (508 mm)
2-year Telescope Warranty CELESTRON TWO YEAR LIMITED WARRANTY
A. Celestron warrants your telescope to be free from defects in materials and workmanship for two years. Celestron will repair or replace such product or part thereof which, upon inspection by Celestron, is found to be defective in materials or workmanship. As a condition to the obligation of Celestron to repair or replace such product, the product must be returned to Celestron together with proof-of-purchase satisfactory to Celestron.
B. The Proper Return Authorization Number must be obtained from Celestron in advance of return. Call Celestron at (310) 328-9560 to receive the number to be displayed on the outside of your shipping container.
All returns must be accompanied by a written statement setting forth the name, address, and daytime telephone number of the owner, together with a brief description of any claimed defects. Parts or product for which replacement is made shall become the property of Celestron.
The customer shall be responsible for all costs of transportation and insurance, both to and from the factory of Celestron, and shall be required to prepay such costs.
Celestron shall use reasonable efforts to repair or replace any telescope covered by this warranty within thirty days of receipt. In the event repair or replacement shall require more than thirty days, Celestron shall notify the customer accordingly. Celestron reserves the right to replace any product which has been discontinued from its product line with a new product of comparable value and function.
This warranty shall be void and of no force of effect in the event a covered product has been modified in design or function, or subjected to abuse, misuse, mishandling or unauthorized repair. Further, product malfunction or deterioration due to normal wear is not covered by this warranty.
CELESTRON DISCLAIMS ANY WARRANTIES, EXPRESS OR IMPLIED, WHETHER OF MERCHANTABILITY OF FITNESS FOR A PARTICULAR USE, EXCEPT AS EXPRESSLY SET FORTH HEREIN. THE SOLE OBLIGATION OF CELESTRON UNDER THIS LIMITED WARRANTY SHALL BE TO REPAIR OR REPLACE THE COVERED PRODUCT, IN ACCORDANCE WITH THE TERMS SET FORTH HEREIN. CELESTRON EXPRESSLY DISCLAIMS ANY LOST PROFITS, GENERAL, SPECIAL, INDIRECT OR CONSEQUENTIAL DAMAGES WHICH MAY RESULT FROM BREACH OF ANY WARRANTY, OR ARISING OUT OF THE USE OR INABILITY TO USE ANY CELESTRON PRODUCT. ANY WARRANTIES WHICH ARE IMPLIED AND WHICH CANNOT BE DISCLAIMED SHALL BE LIMITED IN DURATION TO A TERM OF TWO YEARS FROM THE DATE OF ORIGINAL RETAIL PURCHASE.
Some states do not allow the exclusion or limitation of incidental or consequential damages or limitation on how long an implied warranty lasts, so the above limitations and exclusions may not apply to you.
This warranty gives you specific legal rights, and you may also have other rights which vary from state to state.
Celestron reserves the right to modify or discontinue, without prior notice to you, any model or style telescope.
If warranty problems arise, or if you need assistance in using your telescope contact:
Celestron Customer Service Department 2835 Columbia Street Torrance, CA 90503 Tel. (310) 328-9560 Fax. (310) 212-5835
Monday-Friday 8AM-4PM PST
NOTE: This warranty is valid to U.S.A. and Canadian customers who have purchased this product from an authorized Celestron dealer in the U.S.A. or Canada. Warranty outside the U.S.A. and Canada is valid only to customers who purchased from a Celestron’s International Distributor or Authorized Celestron Dealer in the specific country. Please contact them for any warranty service.
I got this one as a Christmas gift. It seemed like a good telescope for basic astronomy, with many nice features. But I was initially quite disappointed by the fact that the images seemed rather blurry. It took me two weeks to correct this problem, to the point where now I am finally starting to like it.I should add that the telescope had probably traveled a few miles around the globe when it got to me, but the box and packaging were in pretty good shape when it arrived.When I got it, I initially compared it to another $50 reflector, the Celestron 76 mm Discovery, and the results were very disappointing, the smaller one was much sharper. I spent hours reading on the Celestron and other sites on how to adjust collimation with a simple “hole in the cap” and got nowhere. The image was always relatively blurry. Day or night, polaris or no polaris.I later bought the Celestron 24mm to 8mm zoom eyepiece, which allows me to zoom in without changing eyepiece, and it works very well on the smaller 76mm telescope, but again blurry images on this one.After quickly becoming an expert on reflector collimation, I noticed that nothing seemed collimated properly. I guess they don’t even try at the factory on this one? I decided to order a Celestron 1.25” collimation eyepiece ($30), which can be useful in aligning the optics (the two mirrors) in reflectors like this one. I tried it out on this one, and got repeatedly confused on what should be seen in what reflection when you adjust this or that. I spent entire afternoons fiddling with secondary versus primary mirror adjustments, achieving virtually nothing as far as improved sharpness is concerned. I did replace the secondary mirror alignment screws with better stainless steel ones that would not strip, they are metric m4.I then tried to collimate this thing on the North Star (Polaris) and that is, for this one, another pure fantasy. The reason is that Polaris is faint, and every time you move a mirror by a tiny bit (as explained in the Celestron instruction) the star just darts out of view in the eyepiece. More frustration and still no luck in getting this thing in focus.Lastly, I ditched all the Celestron recommendations on day and night collimation (using either the celestron collimation eyepiece or the “ring pattern” for out of focus point sources) and did instead the “EYE-DOCTOR TEST” :I wanted to see how sharp I can get this one, when there is no wind, no shake, no atmospherics, no moving planet, no mist etc. So I placed the telescope at one end of a long corridor in my house, and a nice clean printed envelope with some sharp text on it at the other end. With this method (which I seemingly invented, as it is not described anywhere in the instructions nor on the Celestron site) I was finally able to adjust (by very small increments) the three screws on the secondary mirror till I FINALLY got a nice sharp picture of the writing on the letter. Note that this last procedure did NOT require the collimating eyepiece! Just the regular 4mm eyepiece that comes with the telescope. Success!As a by product, I found that in fact in the end all three eyepieces work rather well, down to the 4mm which is a bit faint, the 20mm with the 3X Barlow is better.Now I can finally see the main two stripes on Jupiter and the Orion Nebula with some clarity. In conclusion:Plusses : Potentially sharp optics and large aperture. Reasonable price. Sturdy mounts. Useful eyepieces.Cons: Imo optics needs to be carefully aligned by the method described here. Mine was definitely NOT aligned and, initially, as a result disappointingly blurry.EDIT: After a few more weeks of use (February 2014), I spent some time using the Celestron collimation 1.25” eyepiece ($28 here on Amazon). My conclusion is that it is a very useful, if not essential, tool for this telescope. To avoid any further issues due to my previous messing around, I first screwed in the secondary mirror (by loosening up the three alignment screws, and pulling in the secondary mirror all the way in until it barely touches the mount), and later pulled out the primary mirror as well(by pulling out all six screws until the whole unit comes out, then reinserting the mirror after making sure the secondary was pointing the right way, straight to the back). Then, using the Celestron collimation eyepiece with its crosshair, I carefully adjusted the secondary and primary orientations (three screws for each mirror) until all the crosshairs overlapped perfectly. In other words, the crosshair in the eyepiece has to overlap perfectly with its reflection through mirrors 1 and 2, and back to the eyepiece. This takes time and patience. After having done that, the image quality seems pretty good and rather sharp. I went down to about 8mm, I don’t recommend getting lower than that. The best setup for this one is the 20mm eyepiece, either by itself or with the included 3x Barlow (which then gives 20⁄3 = ca. 7mm). I also got some Ploessel eyepieces, but they will do you no good if the mirrors aren’t aligned first.PPS. I found (April 2014) that the best way to collimate this (Bird-Jones or catadioptric design)telescope and get nice sharp images is to remove the focusing lens at the bottom of the focusing tube (takes 10 mins), align the secondary and primary mirrors with an inexpensive LASER collimator (mine is an LK1 $30 from seben dot com, takes another 10 mins to do this part), put the corrector lens back in and reinsert the focusing tube (don’t touch the lens with your hands, takes around 5 mins). With this method the results are guaranteed to be reproducible and consistent. The images are then consistently sharp.PPPS. The other day (June 2014)I talked at length to a very nice and helpful person at Celestron technical support (Will?). He suggested to check the following thing. The secondary (smaller, flat) mirror is oval-shape and mounted right under the focusing tube, held in place by three (outside)-plus-one (center) screws. Now put a focusing cap (just an eyepiece cap with a small 1mm hole in the center) at the (top) end of the focusing tube. Then make absolutely sure (after you take again very carefully the correcting lens out of the focusing tube) that the inside of the focusing tube and the secondary mirror, as viewed through the focuser, are perfectly concentric when you view them through the hole in the cap. That is, the secondary mirror has to be perfectly centered when viewed from the top of the focusing tube. Note that the secondary mirror is oval shaped, but will look like a perfect disc when tilted at about 45 degrees. On mine this required several turns on the (secondary) center screw. After this is done, make also sure that the tilt on the secondary mirror is such that you can see the center of the primary mirror (on mine I put a black pen mark at the dead center). Now re-align the secondary and primary mirrors with a laser (in my case), with the cap with a hole, or a cheshire eyepiece. Then put back the correcting lens in the focuser, and you are done. The end result is that on mine it improved the sharpness a bit (I did the eyedoctor test again). I was also able to see more detail on Saturn with a standard 9mm eyepiece, will try taking a few pictures soon.PPPPS: This telescope really shines (due to the light gathering abilities of it’s fairly large mirror) when you want to look at fainter objects. Recently we had good viewing conditions and I had a chance to look the the Great Cluster in Hercules (M13), the Lagoon Nebula (M8), the Omega Nebula (M17), and two more star clusters in the same general region (M4 and M62). I took some fairly nice pictures of these objects with a Sony HX200 camera (30x zoom) mounted piggyback on the telescope, using the Celestron motor drive for the 127EQ and long 30sec exposures at 800ISO. See the pictures I posted on the right. I was surprised how well the telecope mount, equipped with the Celestron $30 clockdrive, works when taking long exposures.PPPPPS: It’s October, seven months after I did the laser collimation, and everything is still fine and exactly the same. That tells me that the collimation on this one only needs to be done once, maybe if it gets out of whack during shipping. After that there’s no need - unless you bump it or drop it badly. At least that’s my experience.PPPPPPS: It is end of February 2015 now, and I had some very good views of the great Nebula in Orion M42. The scope is still perfectly collimated since almost a year ago, last time I did the collimation with a laser. Again, the message here is that if you spend the time to collimate it properly and don’t bump it after that, it will stay sharp almost forever … Btw I love the $32 celestron R/A single axis motor drive on these telescope, and in my opinion it is a very worthwhile investment. Objects stay in view for almost an hour w/o adjustments.
You definitely will need some patience to use this scope. The collimation process on this scope is a nightmare. The instruction manual is weak in this regard and Celestron really should update it to help getting this telescope aligned. This is a bird-jones type reflector. Do your research on this before purchase. If you visit various astronomy forums and ask about this scope, most people will tell you to avoid it because of the time you will be spending collimating it.After you spent time collimating it, then the views are pretty good for the price you pay. Not great, but you get what you pay for. I could see the 2 main bands on Jupiter and the moons, the rings of Saturn, but struggled to see the Cassini division. The moon looks great. M4 and M13 could also be seen and looked decent.I highly recommend some better eyepieces. The 20mm with the 3x barlow isn’t too bad but the 4mm eyepiece was garbage. Maybe I just got a bad one.The tripod and mount is the real weak point here. The slightest breezes will cause shaking. With a good polar alignment, the slo-mo controls will help with tracking your object. This is the benefits with using an EQ mount where you will only need to turn one knob to keep your object in view.The finder scope isn’t to great either. It is to easy to bump it and lose alignment with the OTA. The mounting of this finder scope could be better, but it will work.Assembly of this scope was super easy for me. Barely needed the manual to put this together. It is pretty straight forward.I am on the fence about recommending this scope. If you don’t have any patience, then no. If you have a cool calm head and willing to take this apart and get things aligned, then for $150 this scope really isn’t that bad. Like I said, the views are pretty decent.
I have no comparison for this other than the more simplistic Refractor Telescope my father got me as a kid…so now the circle continues, as I got this for my own son. This is the type I always dreamed of getting as a kid, but back then these were in the $500 range and easily too much for my parents growing up. The price point on this for what it offers is awesome, and I selected this after about 6-8 hours of reviewing specs, feedback, and much contemplation. It was this or the 114mm longer tube version, and I opted for this in the end (I figured this had a little more power and it looked more portable than the longer tube of the 114, since we have to go somewhere to view the sky due to the forested yard we have). We have taken it out twice now, & I was NOT disappointed, HOWEVER, a few pointers will definitely help if you’re thinking of getting this, to give you the best success chance possible:1) What i read about was VERY true–buy a telecope for the tube itself, NOT the eyepieces it comes with. After MUCH searching I decided upon a zoomable eyepiece to buy along with this:http://www.amazon.com/Celestron-93230-24mm-1-25-Eyepiece/dp/B0007UQNV8I figured this would be a nice way to avoid having to replace eyepieces (it comes with a 20mm and 4mm, and comparing those to this zoomable one is night 7 day difference…the quality and the versatility of the zoomable blows the stock ones out of the water). Its especially nice to start in the 24mm (24x) place, align everything, find your target & focus, then zoom in on it (even with the barlow for additional zooming power), refocus slightly and then enjoy the sight! We successfully located and watched both mars & saturn on our first 2 attempts (using only the free google skymap app for Android to help us locate the planets). What they say about the rings of saturn are so true…you will never forget the first time you see them. It IS a bit small, but you can make them out if everything is in focus and you dont touch the the telescope once everything is in view (until the planet moves out of the field of view, in which case the fine-tune movements of the telescope really shines!). All in all, buy this telescope NOT for the eyepieces, but for the tube itself, which is one of the bets values from everything I have seen. If you pair it with any non-stock eyepiece you will not be disappointed! If you choose not to go with this zoomable one I mention here (that the only additional thing I got for this when I first bought it), even though the price is very reasonable currently @ $51, I’d recommend the 9mm one from Celestron (currently about $20). The stock 20mm eyepiece is “ok” but the stock 4mm I found utterly useless. At least the 9mm aftermarket eyepiece gives you about a 2X zoom vs. the stock 20mm. And then you have to decide if the stock 3X barlow (see next) is worth using at all either.2) BARLOW. Had no idea what this was before I bought this or started researching info about telescopes. Basically its a zooming piece for your normal eyepieces. The stock version that comes with this is “ok” but I dont have anything (yet) to compare it against. Lets just say it “works” to some extent, but all the reviews I read about said this one sucked…to go after an aftermarket 2x or 3x. From all the reviews and research I’ve gathered, and now using the stock version, I’d say I’d have to agree in all likelihood. Due to this, and since my son seems to have really enjoyed our first 2 outings, I decided to take the next step & get a combo 2x barlow that also serves as a T-adapter to allow for photography! At only $45, that seems like a really good deal, especially since the 3X barlow I found from Celestron was around $80. The 2x combo can be found here:http://www.amazon.com/Celestron-Adapter-Barlow-Universal-T-Ring/dp/B00009X3UVI can’t say for sure how this will be, but I can tell you it certainly cant be worse than the stock 3x, which seemed very cheaply made (again you buy the telescope for the mirror & tube). Paired with the zoomable aftermarket 8-24mm eyepiece mentioned above and I think itll be a slam dunk. Plus it allows for adapting for use with a digital camera (well possibly non-digital as well, but we have a sony DSLR that should work with the T-adapter for the model we have, which was only about $10…for $55 I get an aftermarket 2x barlow that adapts to allow a DSLR…pretty decent!).3) Other accessories: I have not chosen to get any more than I have listed here, but there was 1 have to mention that I may have to invest in at a later time. One of the concerns about the Newtonian scopes (this is one) was the possibility of having to correct/adjust the mirrors. I chose not to buy the collimator (adjusting tool) out of the box, but was prepared to buy either the cheaper $20 one or possibly the more expensive but from all I can see, more worth it, laser-optics one for about $70. Thankfully it seems my scope did not need it out of the box, but I suspect the lower star reviews that say it didnt work out of the box either had the rare scope that needed it from the get-go, or else the more likely scenario, is that the patience needed to align the finder mini-scope on top of the tube, with the eyepiece view (using the 20mm or in my case, the much better zoomable 8-24x eyepiece, which allows for a much wider field of view than even the 20mm stock) was probably the major factor in most of the low reviews. Having done my research I knew it would require patience when using (see more on that below) and it paid off hugely when you have a 6 yr old and an 8yr old wildly ecstatic with waiting a half-hour to get Saturn’s rings into view…see below for details).3) With the accessories out of the way, lets talk about SETUP & USE. First, for setup, I was very meticulous about it and very careful, but from opening the box to final setup & cleanup, I was done in an hour. NO TOOLS were required. Just a touch of patience and carefulness. Seemed very reasonable to me.4) USE: as I mentioned we have taken this out on 2 outings already (have had it less than a week) and both times were widly successful. I have to say that its really useful to have google’s free skymap with you when you use this, or even another product I got from Amazon, called Stellarium. Both are good apps and do things a little differently. Together they made finding the planets a breeze and helped us find, focus, and enjoy the views VERY quickly. Both mars & Saturn were easily found using the apps, mars being the easier one to figure out even without the app, due to its orange-tinge color.First, we aligned the mini-scope on top (finder scope) using a distant cell tower as a target (rem the images are UPSIDE DOWN, which when viewing stellar objects is not a big deal). Once we had this aligned (took about 5-10 mins) we located mars, and due to the patience of doing the finder scope, we saw mars in the unzoomed 24x eyepiece ON THE FIRST TRY. So do not skip this step if you can!Now, when we first viewed mars it was a huge fuzzy, hazy blob, with the crosshairs intersected it (in the eyepiece, not the finder scope). I knew we had to focus. So in less than 30 seconds we had it focused and viola! The orange “star” (aka, mars) was seen! The kids were ecstatic! But i told them this was just the beginning :). I zoomed in with the zoomable eyepiece and we could actually make out the slightly crescent shape of mars. But the real goal was saturn’s rings! One of the kids had to use the restroom but they said they’d hold it till we saw saturn. I was up against the clock now. but in my 30 mins of use thus far I knew we could do this!In less than 5 minutes later I had saturn in view at low power with rings clearly visible! Kids were in awe (as was i!) and we even tried the 3x barlow (stock). For this, i found that zooming in past about halfway was not very useful. the image was a bit fuzzy. the 3x barlow at 20-24x was good though. I later discovered that this was probably the upper end of the scope’s ability to magnify, roughly 250-300X maximum without image distortion/loss. Thus, going back to the barlow section eariler, is why I think a 2X barlow will be great, using the maximum zoom of the eyepiece (8mm).FURTHER THOUGHTS: I hope you have enjoyed my “journey” described here and maybe help someone else decide if this telescope or Astronomy endeavor is worth it and which one to go after. The more expensive motorized ones are probably worth it if you are really into Astronomy, but I could nto afford them (they start around $300 for 114mm scopes, which is pretty reasonable), or the $250+ Dobsonians (non motorized but even more powerful than this one) are a good option too. But i suspect with the low-cost additions I already have ordered noted above, this scope will do just find for now. Plus they have an motorized addition for this thats only around $35, but it does not auto-track. If you align everything properly reviews have said it does help a lot. Thats something else I may invest in down the line. All in all, for under $200 starting, I got this scope & the aftermarket zoomable eyepiece which I almost call a must. For around another $50 you can get an aftermarket barlow that even opens up some astrophotography (but I am sure thats going to take a lot of patience to be successful from what i have read). Good luck and REACH FOR THE STARS! :)
Not for first timers. Please go with refractor style it’s easy.
I’m sure it will be an amazing product with great features once I master this declination and R.A axis thing.. it looks much more expensive although the price was modest..
The quality is quite good. However I’m not that good with astronomy to appreciate its wonder.
crap. completely out of focus. another useless pile of crap I have to drag to end of the driveway. spend a little more, buy it at a store where you know they will be able to…
gift
For the price this is a great telescope. It took a long time to assemble and there were a couple of pieces that I feel could have been built a little better but it is great for…
damaged
This Telescope is a bird-jones telescope. This is an issue because collimation will be very hard to do.
1
comments powered by DisqusBest telescope, worst eyepieces.It has a great magnification but you better buy a few eyepieces, the ones that come with it are usually defective and poorly tested.