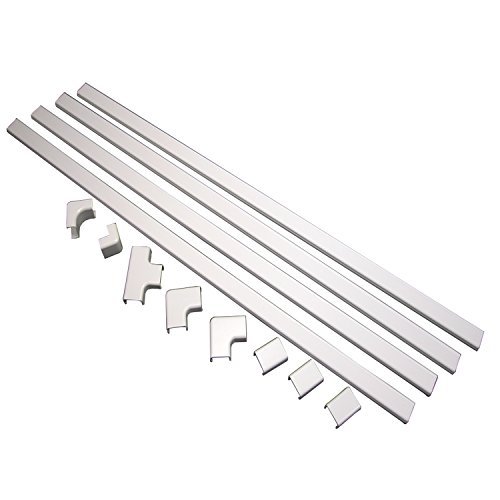
Streamlined: to blend with any décor, Great for Concealing and Cord Organizing: conceal phone wires, cables, cords and speaker cable
Size:1 Pack Product Description Especially suited for covering home entertainment wires, speaker cables, TV/video cabling and home office wiring. Organize and hide cords and cables easily. Self-adhesive backing makes for easy installation. Stylish design complements any interior setting. Paintable.
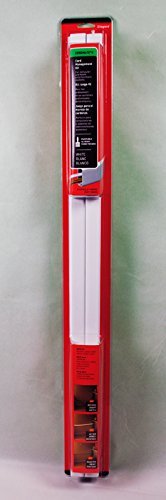
From the Manufacturer Home Entertainment cord and cable covers, great for low capacity wire applications
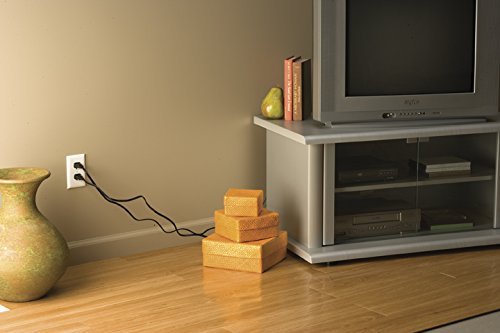
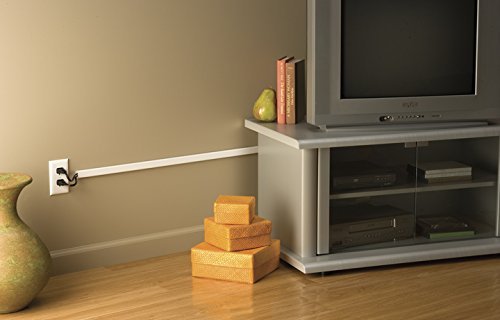
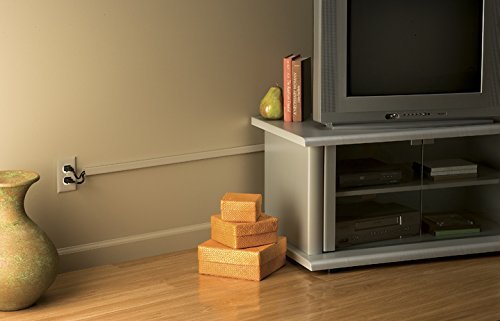
Wiremold has been around for years - although some electricans do use it in special situations, it is really intended for the homeowner to hide and mount cables on the wall (as opposed to in the wall like an electrician would) at a low cost for neatness (see my photo).This product is the newer revision of the CMK210 which started out the flat screen/computer monitor/tv on wall mounting as it has enough channel space to hold 3 cables (TV, a/c power, computer e.g. HDMI) on the wall and still shut - internal dimentions of 7⁄8” x 3⁄8” accommodate most computer cables except those with RFI filters on them.An alternative to the CMK50 is the CMK210 which has more joint pieces, like the T which I used for the AC plug to exit the wiremold and go into the outlet. Dimentionally, also the CMK210 gives you 3x4’ pieces or 12 feet of channel while the CMK50 gives you 4x30 inches or 120 inches = 10 feet of channel, so you get some extra fittings and extra channel length in the cmk210. The amazon description of the cmk210 is off in that it gives a 1.2 x 2” channel size, in actuality the 210 and the 50 are almost identical in that they will hold 3 average size wires.Another alternative for people who need more than 3 wires to their a/v on wall set is the cmk-30 which is a wide channel designed to hold many a/v cables between say an a/v rack and a wall mounted tv set.Cautions for use:The adhesive is really powerful once you peal the waxed paper - you have about 5 seconds before it’s permanent on your painted surface, so a helper to hold a level plumb for vertical runs is nice to have. Also keep in mind that if you are running horizontally along the baseboard, while it may seem ideal to touch the baseboard, you need room for the joint clips which go over the outside - you can make a shim or you can just use the joint clips along the piece you are sticking to the wall to esure that there exists a gap sufficient to hold the various pieces between the wiremold ouside and the baseboard. These are not printed in the instructions, but having worked with their product now several times I found that you need to provide space for the clips or else you end up notching the baseboard or else breaking part of the clip that interferes and gluing it to the wiremold.There is no hinge except the flexibility of the plastic, so don’t plan to be opening/closing these channels often - they have a J hook that clips into a bead on the thin (3⁄8”) side so closing is easy, just get it started and then run your fingers down the strip pressing it into the clip. Keep in mind if you ever plan to open this up, don’t point the j-hook seam into the ground or a wall corner - point it up or into the room for access at a later date as things change. Opening it is somewhat tougher in that you have to undo the j hook by compressing the wiremold at one end, get a screwdriver or other instrument (putty knives work well) into the channel and separate it, working your way down the channel.I can not overemphasize the importance of measure twice cut once - remember you get 4 30” pieces in this kit - if you cut carefully and strategically you will be able to use the waste piece in part of the run like around corners.Once finished they can be painted but be sure not to get paint into the J-hook closure along the side because you will seal the channel (unless you want to seal it permanently then paint away!). Personally, I don’t mind the white color but it is really your preference as to paint the surface or not.Wiremold also sells the other fittings as separate parts, for example this kit does not include the T connector which is a great way to escape the wiremold channel neatly - as opposed to drilling holes in it which would look messy (I do drill a v notch on the back (sticky) side when I have a wire that has been run through the wall and is entering the wiremold, but I found that the best places to enter or exit are where there is a fitting such as a corner fitting which gives you more room than the channel does, especially in the -210 version.So to sum it up -For power/speaker cable, you get 10 feet with this kit the cmk-50 plus corner elbowsFor wide channel with multiple (5+) cables you can use the cmk-30 a/v specialtyfor a little longer system with more fittings and 2 extra feet the cmk-210 is almost identical to the cmk-50 (this one) but has the T connector, and on wall left/right fittings.Do a little smart shopping with your measuring tape and read the product descriptions for wiremold products - they have been doing this for 2 decades+ now and have the method down for manufacturing. If you ensure the surface is free of dust and oil before sticking it it will hold as long as the wall is there but before pealing off the wax paper, mock up your entry and exit points with the provided clips and elbows so that you know where you need a tad extra gap for the fittings. I cut mine with a miter saw Hitachi C10FCE2 10-Inch Compound Miter Saw but you always make square cuts, so that’s overkill - a hand hacksaw will work fine as will a sawzall, but using the high speed blade on the miter saw gives professional square cuts by slowly moving the blade through the channel, chipping small pieces. The only risk using power tools during cutting can crack the opposing side of the channel’s plastic which I did trying to cut too fast- if you crack it, it mends well with shipping tape like amazon uses on the boxes they ship to you (clear).Good luck with you neat cable project - patience, and measurement will ensure a perfect job when done. You will stand back and say it looks 1000 times better than the clutter of cables you had before.
These are great for hiding cables on the wall instead of drilling holes to hide your cables, you can fit about 5 cables in one, but it’s a very very tight fit. It uses adhesive tape on the back to stay on your wall, what I did was tear a small portion on the top and bottom of the tape to only reveal a small amount of adhesive so that it is easy to remove in the future, because I can tell the adhesive is very strong and will rip your paint off your wall if you use the whole adhesive strip.
the price is good, you do get 3-30” pieces, they work really good just peel off and stick it to the wall, the bad part is you can only fit 3-4 cables in my case I manage to get 2 HDmi, 1 power and one coaxial cable and there is no even room for air :) They measure 30” long, 1” wide and 3⁄8 thick.
I didn’t need any of the corner pieces nor to make any cuts for my application. I just peeled and stuck two lengths of conduit to the wall. It was wide enough to fit three fairly thick cables (two HDMI cables and one power cable). The conduit snaps open and closes securely. I’m not sure how it will be to ever remove the conduit since it feels very securely stuck to the wall. A paint job may be required after removal from painted plaster or drywall.
Works well, had to double up the conduit to hide the amount of wires I have. Sticky tape held for about 6 months, had to put some 3m on the back to get it to stick to wall again.
Purchase Date: 19DEC15Purchase Price: $13.54While remodeling our bedroom we thought we could mount a TV with stand on a certain wall and hide all the wires with no issues. But…then of course many different issues arose and running the wires in that wall would cost way too much to professionally do and to do it myself well was not worth all the work and headaches. The last alternative was to use Wiremold CMK50 for a neat look. Item is very well packaged and internal dimensions of the Wiremold are 7⁄8” x 3⁄8” which can accommodate a good amount of wires. 120 inches = 10 feet total. After reading the reviews and watching YouTube I was hooked.Make sure to wipe down your wall prior to installation. The adhesive on the Wiremold itself is very strong and once it is set it is not easy to remove.Measure everything twice and cut once as they say! Have a level tool handy so that you install them straight (having a second person to help is great). After your measurements you can use a hand hacksaw and use a little bit of sand paper if you want to clean the edges after cutting. I purchased a flat plug extension cord for a more sleek and clean look (see pictures). I also switched the wall outlet (180 degrees) so that it would face the correct way for easy connection. Beware: Please shut off homes electrical panel breaker for that room prior to doing this - for safe measure test the outlet after shutting off the breaker with a outlet tester to make sure there is no power running to it. You will be surprised sometimes at how you will shut off the breaker for a certain room but there might be a outlet or two that are still running power because its connected to the room on the opposite side. Taking your time makes the installation a snap.Already purchased a second order for a couple of other things around the house. (PICTURES ATTACHED)Update: 02OCT16. No problems with the product or its quality.Please Note: I did NOT receive any type of incentive to write this review. This review is my honest opinion after doing much research and purchasing this product for use. Prior to purchasing any product I conduct thorough research. “Was this review helpful to you?” if it was please select “YES” below. Thank you! :)
Perfect for hiding cables. Used these to hide an Ethernet cable running to an access point hanging on my wall.
Best wire hiding kit ever. used matching paint as my wall and it looks legit
Great product with the decent price. just ordered one more as needed more.
They look nice but several would not stick to wall. Will not buy again.
It just works
exactly as described
As described. No issues. Would order again.
Very nice looking for my waiting room at work
Nicely hides cables in my home office.
comments powered by DisqusHas large opening to hold multiple cords. But the adhesive is not strong enough for my textured plastered wall.